Nature Manufacture’s World Streamer 2 is a really amazing tool, but it’s confusing as hell.
Both the included manual and tutorial video are difficult to follow. The manual is all over the place (not a quick start guide) and the Tutorial Video starts in the middle and skips over some required steps! Neither is in a step-by-step order to allow you to start quickly and neither properly covers how to add the tool to an existing world, which is where we hope to help.
What are the steps to adding World Streamer 2 to your project?
These steps are an amalgam of things we picked up from the tutorial, manual, and our own trial and error. We did this with an existing project, but it should work with a fresh start too. We recommend you check the end of the document before you start if you’re using Crest, Micro Splat or Digger.
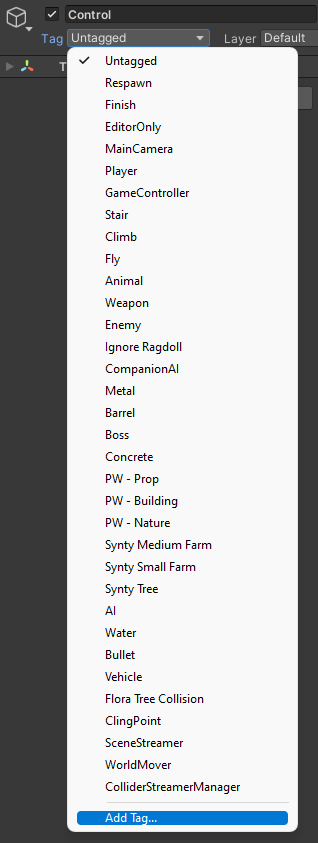 | Step 1 select any object in your world, click the tags dropdown and add three new tags, with these names: SceneStreamer WorldMover ColliderStreamerManager |
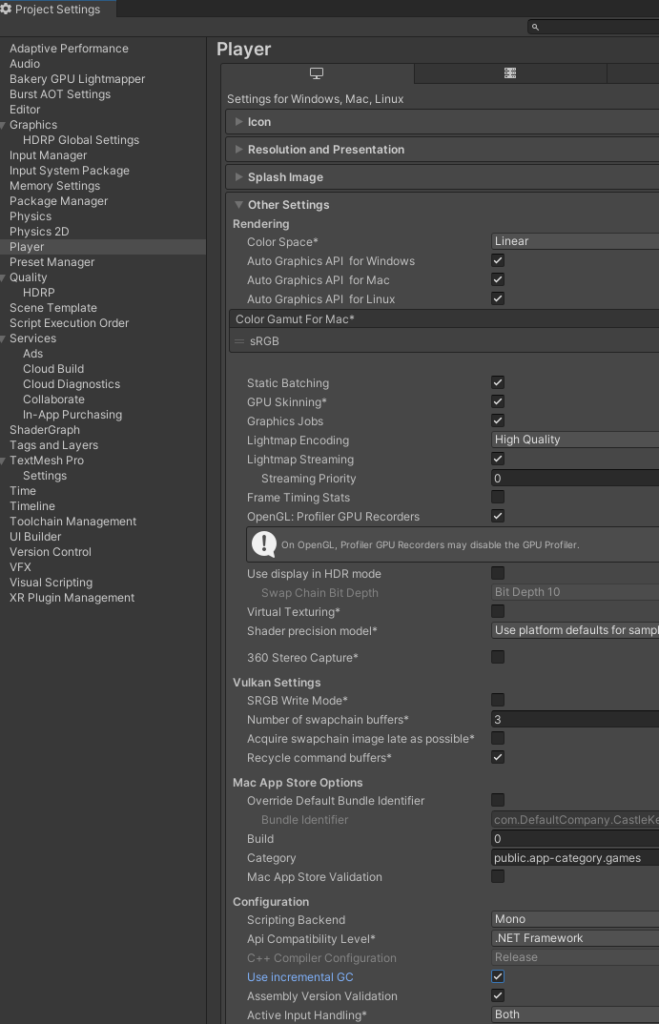 | Step 2 in Project Settings make sure that Use Incremental GC is switched on |
| Step 3 decide which scene is your Game Scene (or create one). This is the scene where your UI, Player object, Camera, Directional light and World Streamer prefabs (managers) will live Note: Work Scene and Game Scene are the terminology World Streamer uses, but you can name these whatever you like | |
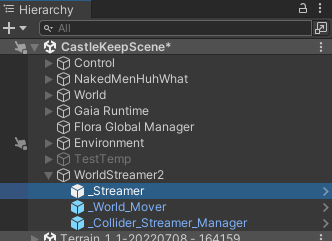 | Step 4 add the three World Streamer prefabs somewhere in the hierarchy of your Game Scene. |
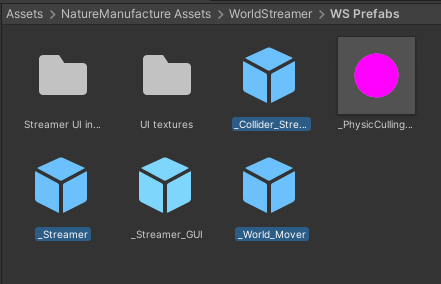 | The prefabs are found in Nature Manufacture Assets > WorldStreamer > WS Prefabs. The prefabs you want are named _Collider_Streamer, _Streamer and _World_Mover. |
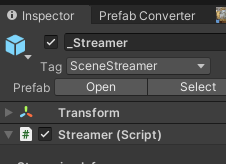 | Check in the inspector that the three prefabs have been associated with the three tags you created. If you have the error ‘Add scene collection manager’ showing on your _Streamer object, don’t worry – we’ll cover that when it’s relevant in a later step |
| Step 5 add the Game Scene (the one where your player object lives) to the Build Settings as the first item in the list | |
| Step 6 (Potentially Optional) decide which scene is your Work Scene (or create one). This is the scene where you actually build the terrain and world (buildings, props, roads, lakes, etc.) If, like us, you are coming from Gaia Pro and already have terrains as separate scenes. We suggest starting with your centre terrain – you can repeat the steps on the other terrain pieces later. Note: We say this is potentially optional, since we were able to do all of the steps just in the Game Scene. We’d love to hear from you in the comments if you know why/if this is a bad idea. | |
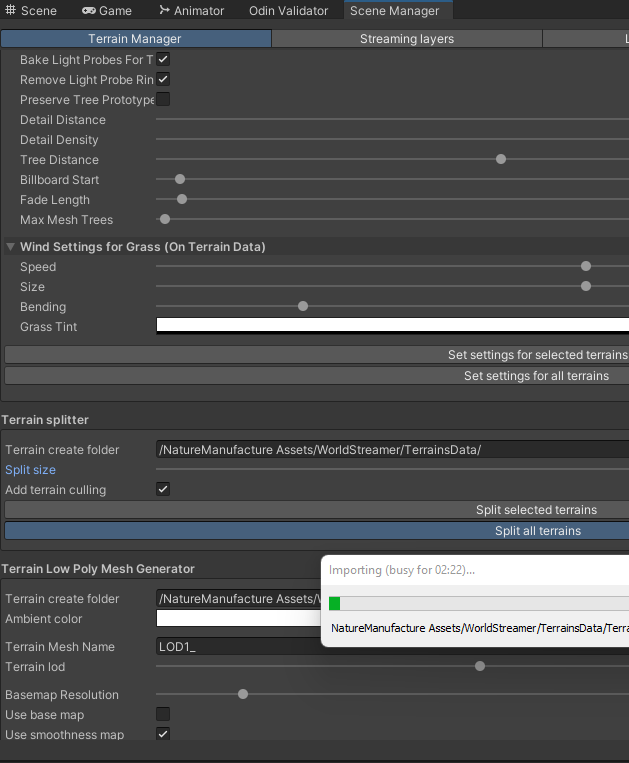 | Step 7 split your terrains up! From the Unity menu’s select Tools > Nature Manufacture > World Streamer > Scene Manager. This will open a new window, from which you should remain on the Terrain Manager tab and scroll down to Terrain Splitter The options for the Terrain Manager are explained in this part of the tutorial, but since most defaults are good, the important two here are these: Split Size – this value is “how many parts will we end up with, in each direction”, so the number of terrains you end up with is ‘split size squared’ (or cubed) Add terrain culling – we recommend leaving this on, when it’s on it means that terrains behind the camera will be unloaded (we can define a delay later) Pick your values and then select Split all terrains or Split Selected terrains to start the process, then find something else to do outside of Unity – if you have a large world, the split operation is going to take a long time. We recommend doing this before any work with digger, rivers etc. |
| Did your terrains disappear or turn pink? Are you using MicroSplat? If so, see this note first, to make your terrains show up again, then continue with step 8 | |
| Step 8 (Optional) with the terrains now split we can create Low Poly meshes – this allows us to keep terrain loaded way into the distance, because the far-away pieces will be replaced by an imposter with low resolution. You can check the settings for this in the linked tutorial video, but the one we will mention is Use Base Map (because the video is unclear on why you should or shouldn’t use it). This should be switched on for most of us if the Base Map Distance is set to anything more than 2x the size of a split terrain. We recommend not doing this until after any work with digger etc. | |
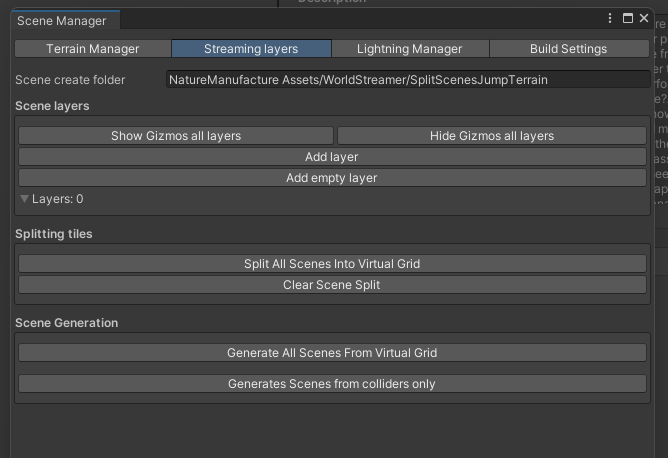 | Step 9 set up streaming layers. This is how we set separate streaming rules for different categories of objects (e.g the terrains themselves, low poly meshes, large and small buildings and objects) The first part he skips over, is that you decide what layers to have for yourself. We have an open world where we can wander in and out of buildings, so we chose to create the following layer types: TerrainAndTrees LowPolyTerrainMeshes HugeObjects – E.g. Buildings, Cliffs MediumOutdoorObjects – E.g. Market stalls SmallOutdoorObjects – E.g. Tools, Mushrooms Note: You may have noticed we specifically only stream outdoor objects. That is because in later steps we can handle interiors with a different (collider) approach. From the Scene Manager, choose the Streaming layers tab and then click Add layer to create whichever layers (categories) of streaming you’d like to have. Each layer that you create, will create a Scene Collection Manager object in your assets at the path defined at the top of the Streaming layers tab. We discuss the parameters as the next step. Tip: Rename the SceneCollectionManagers objects as you create layers, so you can easily understand the object’s/layer’s purpose later |
 | Step 10 configure streaming layer parameters. Most Important – The first pair of parameters to check are Size X and Size Z. For terrains themselves and anything that loads at a similar range (E.g. buildings) These should match your terrain size. For example if you started with a 1km tile and chose 2 as your split size in Step 7, your new terrain sizes are 500. Other layers will get gradually smaller as we treat Size X/Z as the maximum distance to render, for example around 250 for medium objects and 100 metres for small ones. This may take some trial and error since it’s individual to your game. Optional – You can also choose ‘Split Y’ and set a size for the Y splits. If you split by Y you’ll end up with cubes since one set of Y splits will be created for each XY split. Here we use Y splitting only for small and medium objects, since these may exist underwater/underground, while the other layers should be streamed as soon as the terrain is streamed. Required – Choose a GameObject Prefix. This is how World streamer will find which objects belong to this stream. There are two ways this prefix can be used: – The name of each object in your hierarchy can start with one of these layer prefixes – Objects can be nested under another object which has the ObjectParent Script component, with the prefix set in the script field Required – Lastly you’ll set a Scene Prefix value. This does not need to match the GameObject Prefix, but you can see how we set ours in the screenshot to the left. |
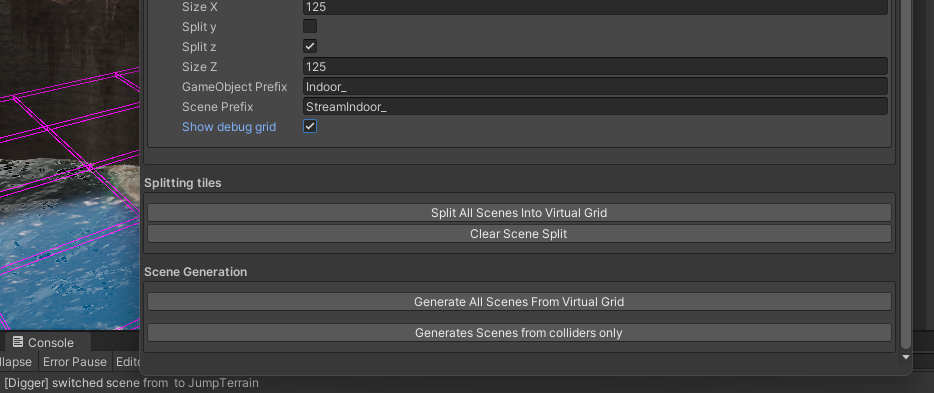 | Step 11 after you have configured how your layers will act, you now needs to create the virtual grids that world streamer will use. You should do this by pressing the Split All Scenes Into Virtual Grid button, at the bottom of the tab, however we found this did not work with the next step, despite the grid showing up and instead we needed to press the S button for each layer. Hint: If it worked, you will see a lot of new items in your hierarchy with the Scene Prefixes you set before. You can click the Show debug grid checkboxes on each layer to see how your streams are actually split. |
 | Step 12 once you’ve taken a look at the virtual grid and you’re happy with it, now you need to create the ‘Scenes’ – Scene objects that live on the disk instead of in memory and can be loaded additively. Do this by clicking Generate All Scenes From Virtual Grid, right below the virtual grid button you used before. Note: Unlike creating the virtual grid, creating the scenes can take a short while. Especially if you are splitting by the Y axis as well as X and Z. From our testing, if nothing is generated except empty folders, you’ll want to go back to the previous step and use the S buttons we mentioned. |
 | So what if ‘Generate all scenes…’ did nothing? If no scenes were created, it means nothing was found – if you changed all the prefixes like we did, even the terrain one, then either you need to change your objects to all start with the prefix, or create a parent with the object parent component and the correct prefix. See the image on the left for an example |
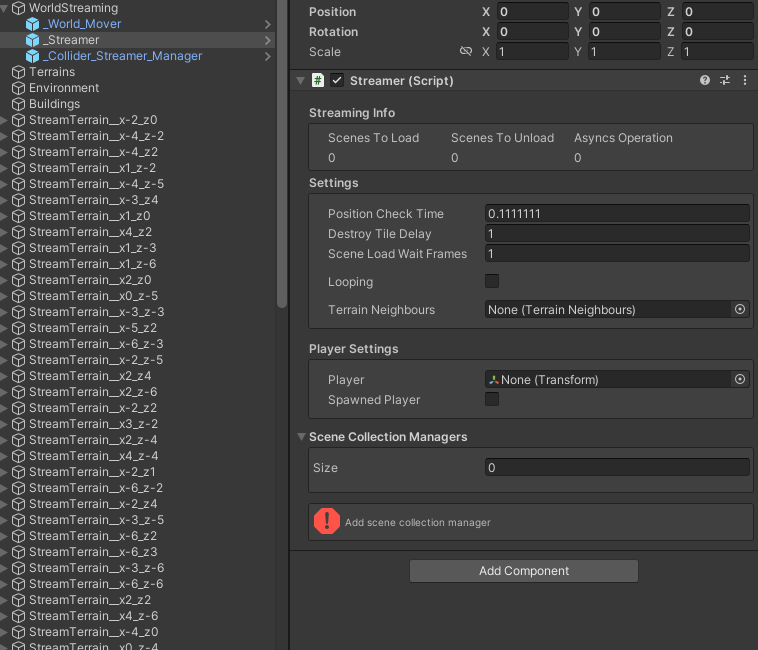 | Step 13 (If you’re lucky, this step may not be needed) We found that the WorldStreamer prefabs we added earlier, were not automatically populated. If you see an error like “Add scene collection manager” in the inspector for the _Streamer prefab, you’ll need to manually populate it. Right above the error, you’ll want to expand the Scene Collection Managers section and change the size from 0 to, however many streaming layers you created – for us, that was 5. Then you’ll need to drag your managers into the slots that appear. You may also see the error ‘Scene collection path doesn’t exist’. Don’t worry about that one, it seems to happen when we have a a steaming layer (from step 9) that doesn’t yet have any scenes in |
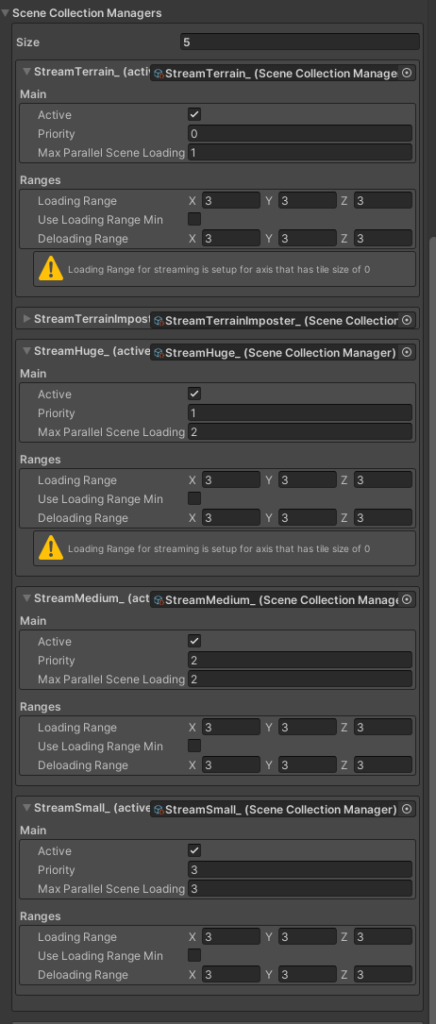 | Step 14 set up the parameters of our Scene Collection Managers. Expand each of the manager slots from Step 13. Change the priority of Terrain and LowPoly Meshes to 0 (the highest) and then make the others lower based on your own preferences. we set Huge as priority 1, Medium priority 2 and Small priority 3. Likewise, set the max parallel scene loading values based on how expensive the operation is. Since Terrains are very expensive you’ll want to leave those at 1, but for things like very small objects which are just tiny meshes, we may be able to afford to load several at once. See our setup in the screenshot. |
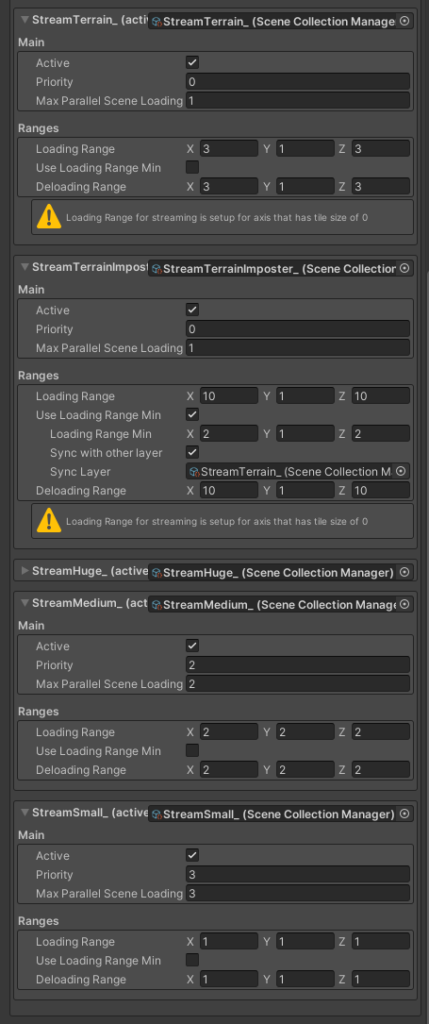 | Step 15 choose the range to load. These values will be very game specific. The aim here is to load only a short distance of real terrains and a bigger distance of low poly imposter terrains and similar for the other objects. For example we load up to 3 real terrains from us, but 10 imposters, in our screenshot. Important: What you do need to do here is ensure that in the low poly streamer you select Use Loading Range Min. This will give you access to a second checkbox Sync with other layer which should also be switched on. The other layer you should select to sync with is the one which loads real Terrains. That means the two layers will automatically notify each other so they don’t accidentally both show at once. |
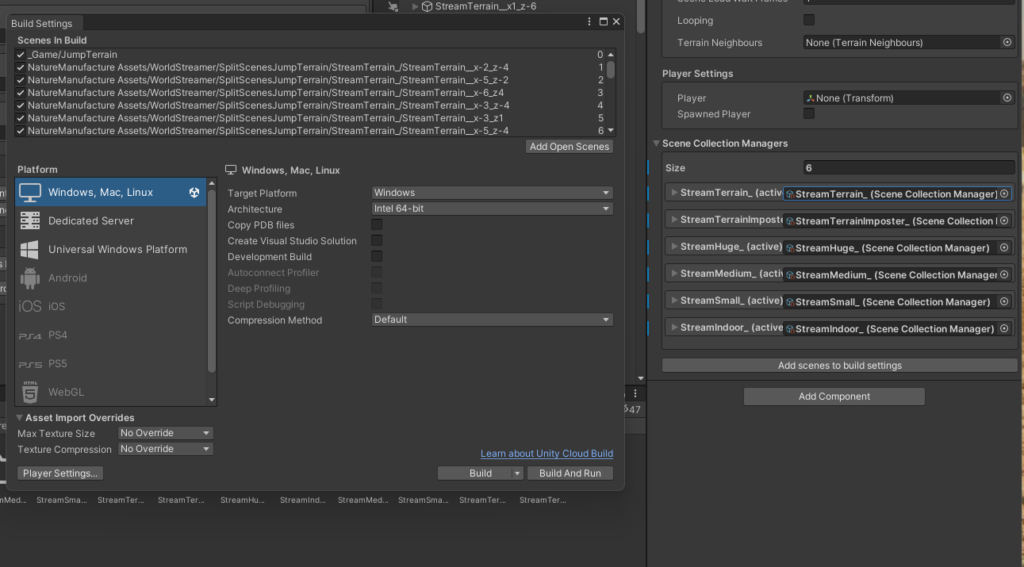 | Step 16 in order for the streaming to actually work we need to make sure all the new scenes get built. Select the _Streamer prefab in your Game Scene and from the inspector, click Add scenes to build settings to automatically add all the world streamer scene parts to the build settings |
| You might be finished! At this point that might be all you need to do, but when you want to use collider streamers you’ll need to read the last few steps. In the meantime, if you copied us and used a single scene rather than the work and play scenes described in the video, you’ll need to clean up: _Streamer will take care of loading the split scenes we created, so you should delete all of the objects in the hierarchy which were created by Step 12. If you want to be extra safe, you can just save a backup copy of your main scene. | |
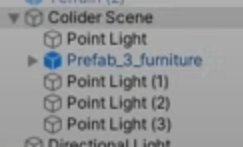 | Step 17 set up Collider streaming for interiors. If we have an open world we aren’t going to want to keep every object and light from every enterable building loaded into memory with the terrain. To handle this we have colliders around buildings which trigger the loading of interior components just in time. The first step to setting up an interior is to make sure all of the interior items – but not the building itself – are nested under a single root object. Do this for each interior that you want to load individually. |
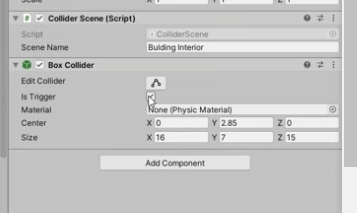 | Step 17 set up Collider streaming for interiors. If we have an open world we aren’t going to want to keep every object and light from every enterable building loaded into memory with the terrain. To handle this we have colliders around buildings which trigger the loading of interior components just in time. The first step to setting up an interior, is to make sure all of the interior items – but not the building itself – are nested under a single root object. Do this for each interior that you want to load individually. |
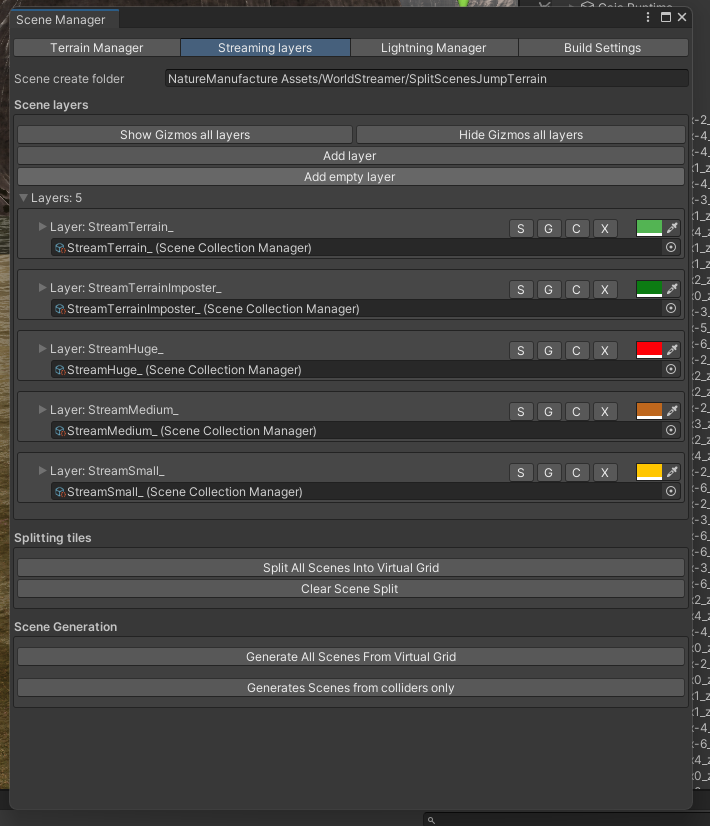 | Step 19 add the collider zones/interiors to the streaming layers. To do this, open the Scene Manager again and go to the Streaming Layers tab. At the bottom, select Generates Scenes from colliders only. After this operation, make sure to repeat Step 14 to add the new scenes to build settings. |
| Step 20 set up the Lightning Manager (sic). At this point, the basic setup of World Streamer 2 is complete. We will follow up with an article discussing Local Area Updater, Lighting, Teleporting, Loading, Floating Point and Looping at a later time, since much of it needs testing with various tools we use. For now, those topics are covered to some degree at this point in the video tutorial. |
Notes and Warnings about using World Streamer with Gaia, Digger, Crest and MicroSplat
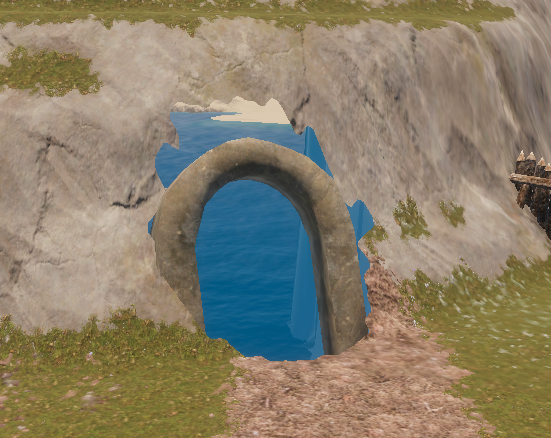 | If you use Digger, Everything is going to go bang when you split your terrain. Since digger data is tied to a specific terrain, you won’t be able to reset things from the previous terrain using Digger either. For this reason, we recommend making changes with Digger only after Step 12 at the earliest. |
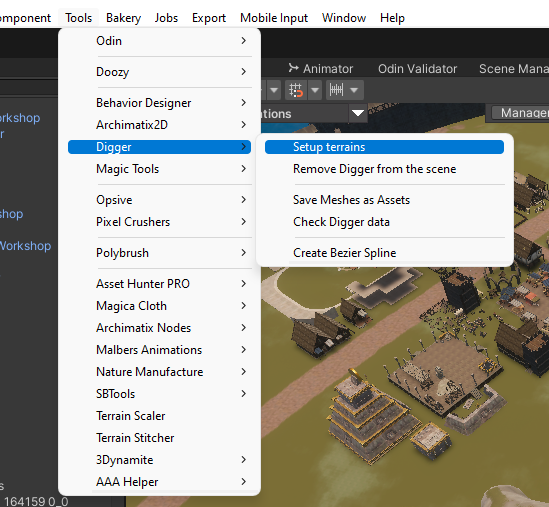 | If you’d like to use Digger with the new, split terrains, don’t forget to enable it by selecting: Tools > Digger > Setup Terrains from the Window menus |
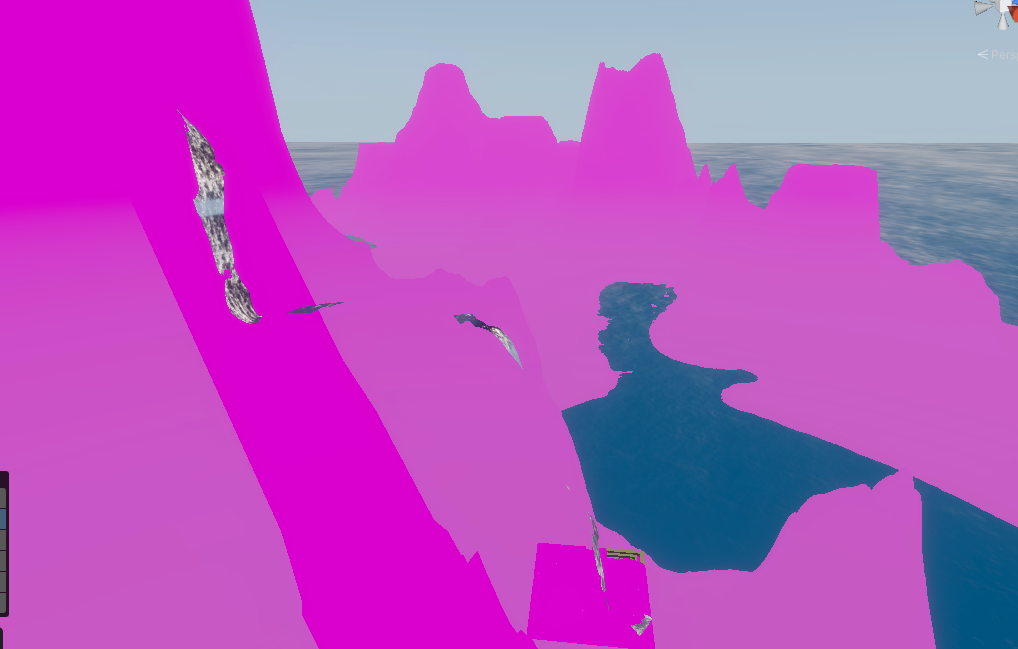 | After splitting terrains, if you use MicroSplat you’ll need to reapply this from scratch. To do this, select all of the new terrains, click Add Component in the Inspector and then add MicroSplat Terrain component. Optionally drag your existing MicroSplat material into the template material field Lastly hit the Convert to MicroSplat button, which should see the terrain return to normal textures. |
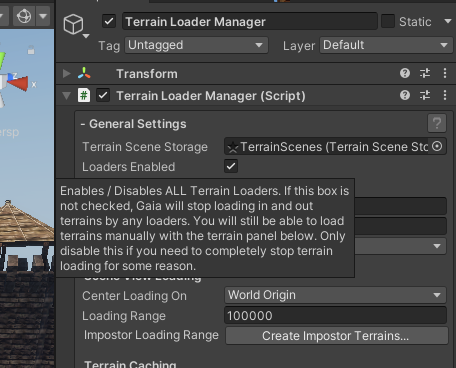 | If you originally set up your terrains with Gaia Pro and enabled Gaia’s streaming, you’ll want to switch that off, after you split the terrains. All you need to do us untick Loaders Enabled in the Loader Manager inspector, then you can go through your hierachy and remove each Gaia terrain scene (from the three-dot menus on each item). The terrain within the scene should have already been made inactive by WS, so removing the scene has no impact. |
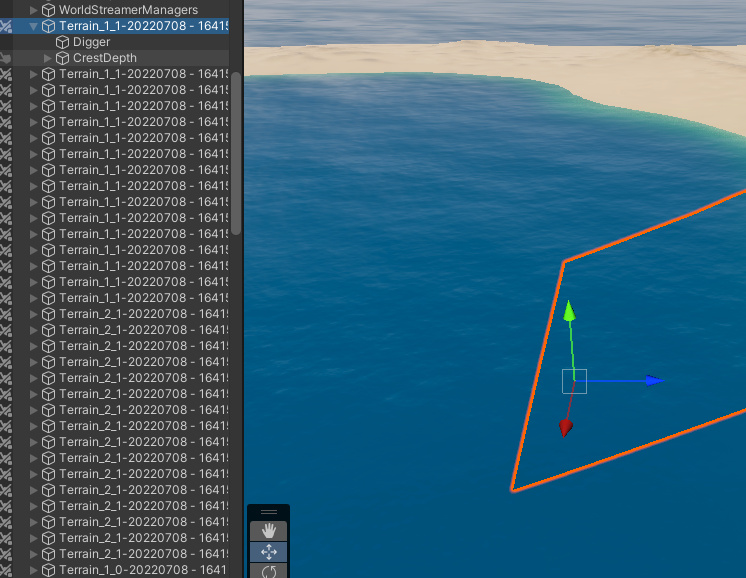 | When you’re using Crest, if you want nicer shores, then for (at least) each terrain that is a shore or underwater, you’ll need to set up a depth cache. Do this by creating an empty object under the terrain (set to 0,0,0 position, 1,1,1 scale). Name this whatever you like – I called mine CrestDepth as in the screenshot. |
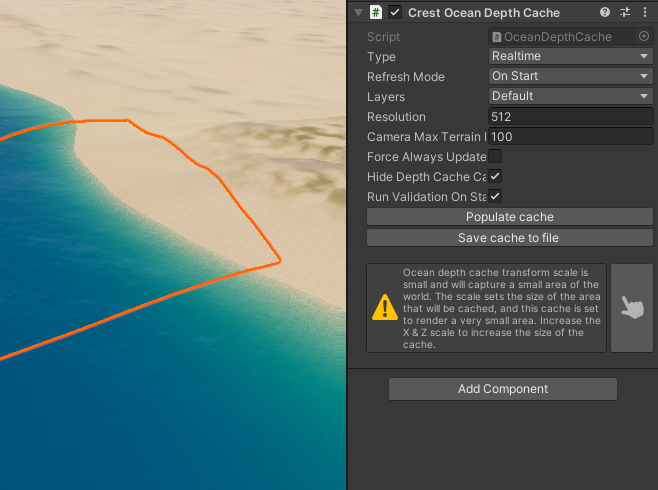 | On the empty object add a Crest Ocean Depth Cache component and then Populate Cache on that component |



This helped some still very confused by it. A more step by baby step would be great. Please contact me if you would be willing to help more.
Haha it is tricky! It was trial and error and hard work getting all the tools working together, I think I have about as many steps as is reasonable without becoming a whole series
Hello topman, do I need create a Gaia terrain before step 7?
Thanks.
Yeah, you need to create whatever terrains you want, before the split step BUT Gaia can generate the terrains already split, so you can probably skip step 7 completely.
After WS splits terrains it just needs a list of the new terrain scenes it has to work with, so you can give it the gaia set.
It’s been a while since I did it, so I cant be more specific. Realistically if you want to use my guide here, it might be easier to do the inefficient route – make gaia create a single terrain and use ws for the splitting as usual